Kodak 2393 LUT – Alex Montoya Real World Examples
Kodak 2393 LUT Alex Montoya Footage Breakdowns from Juan Melara on Vimeo.
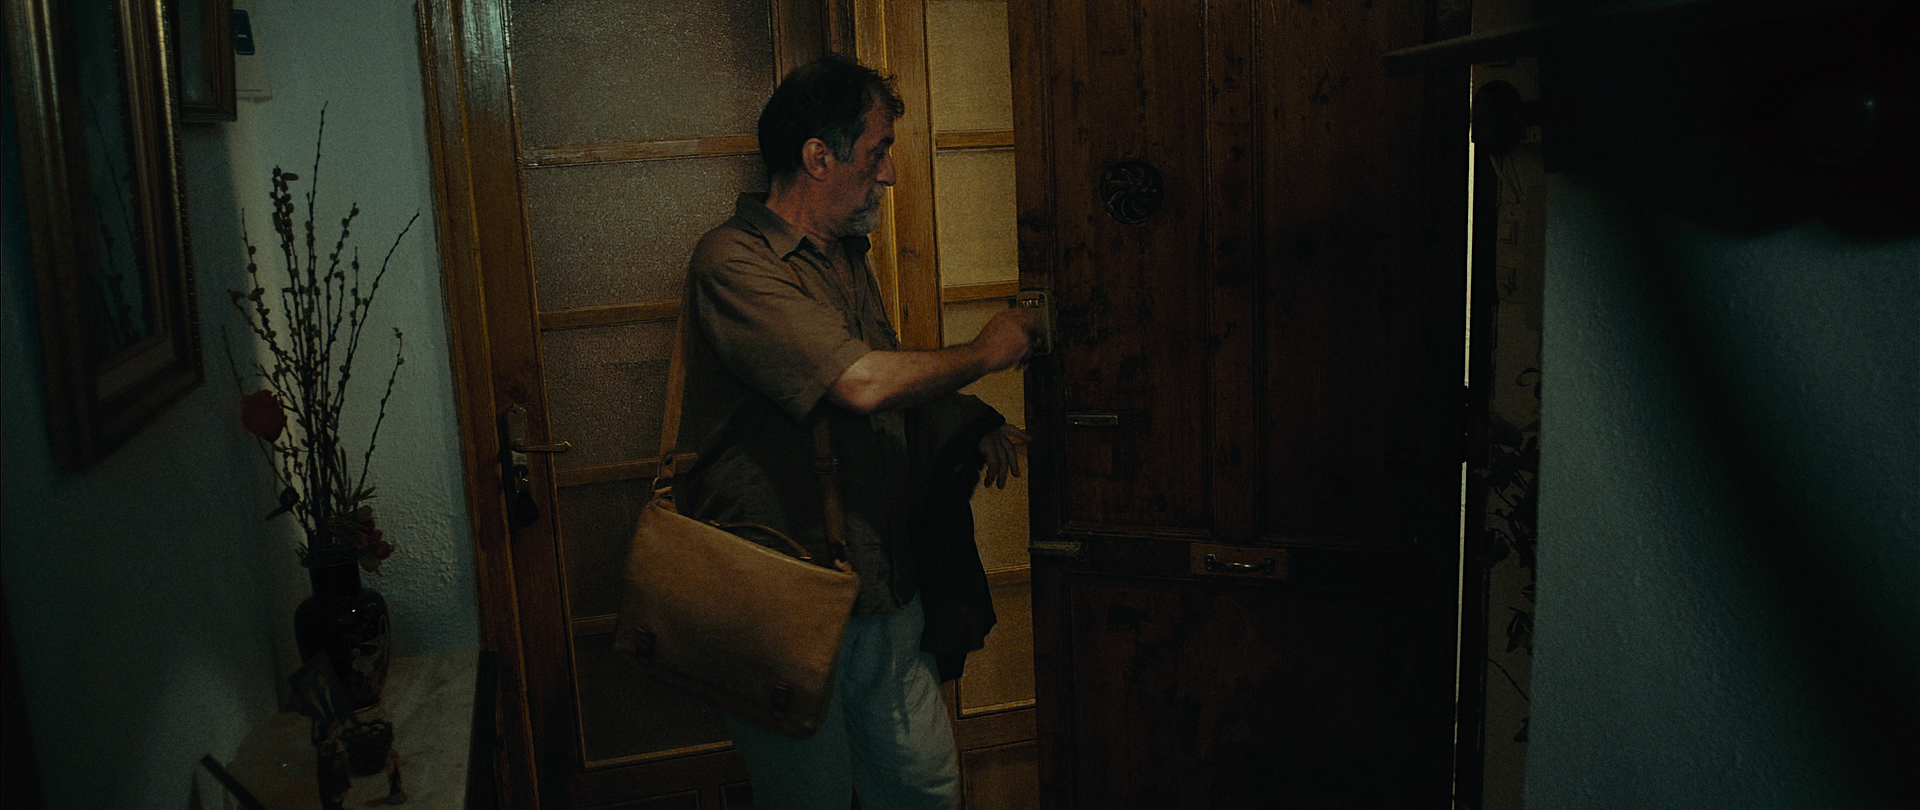
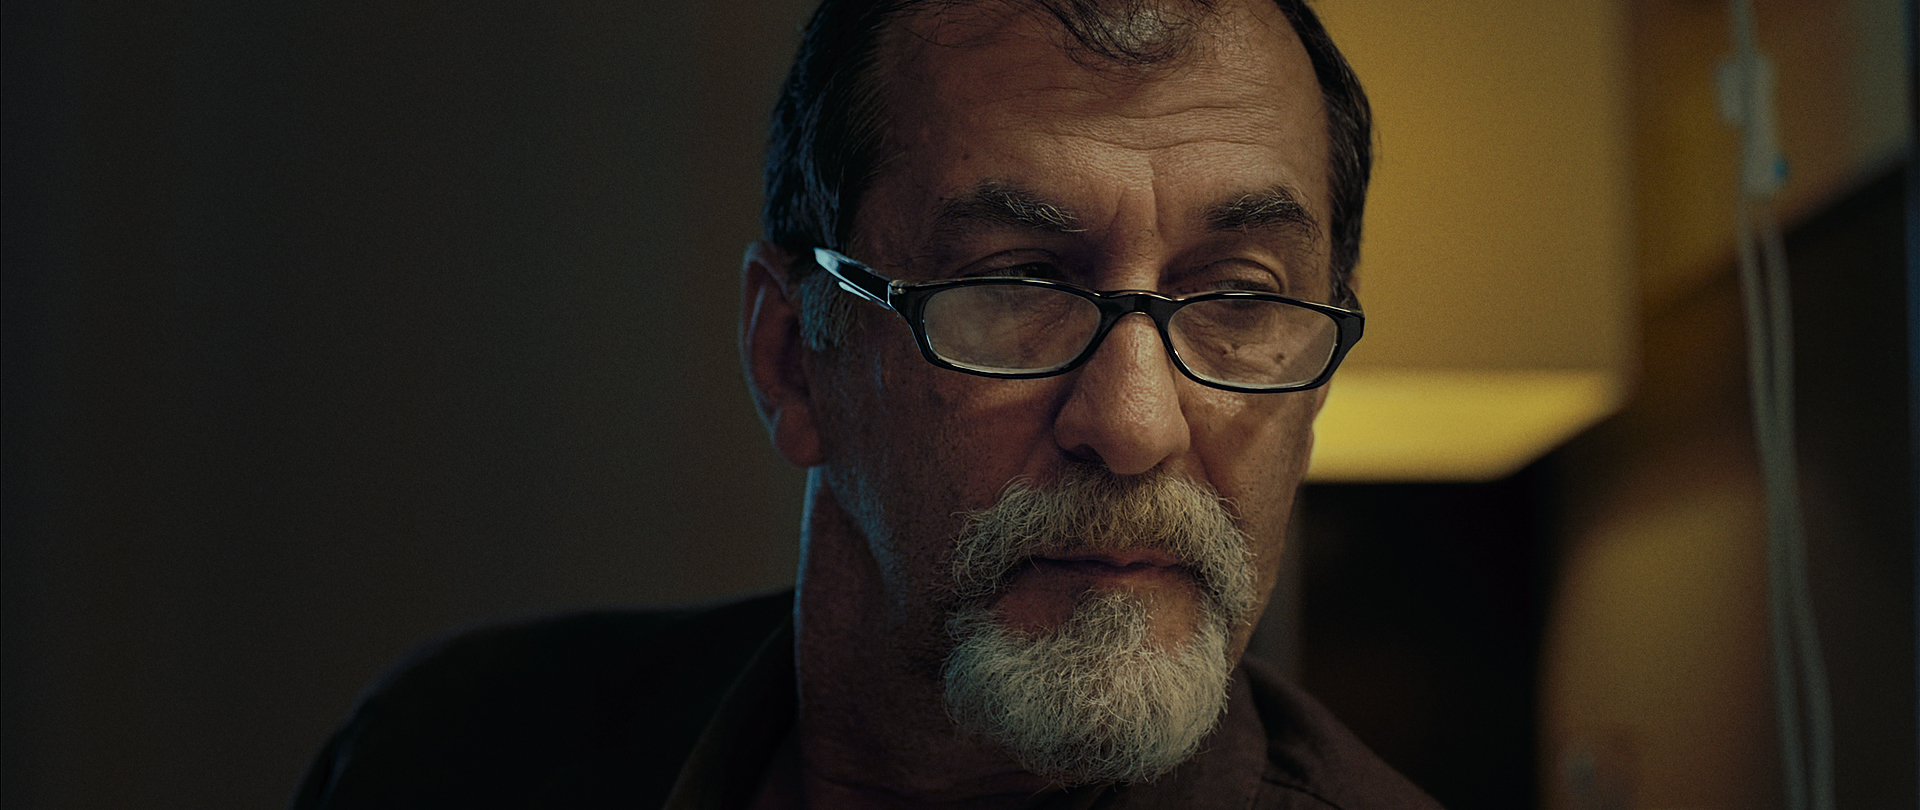
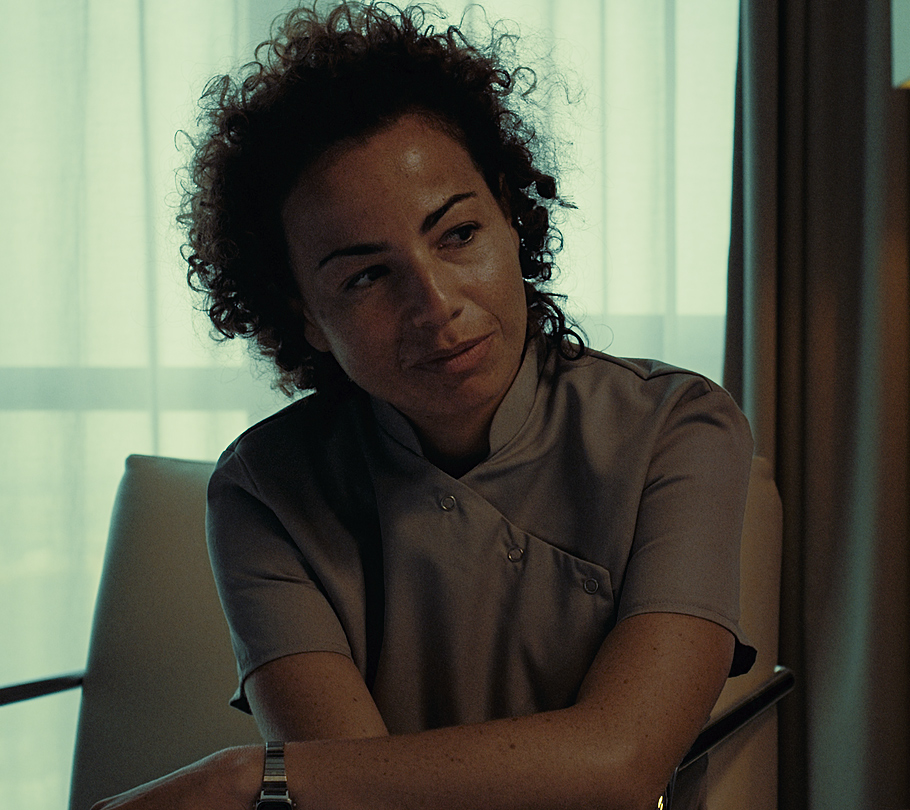
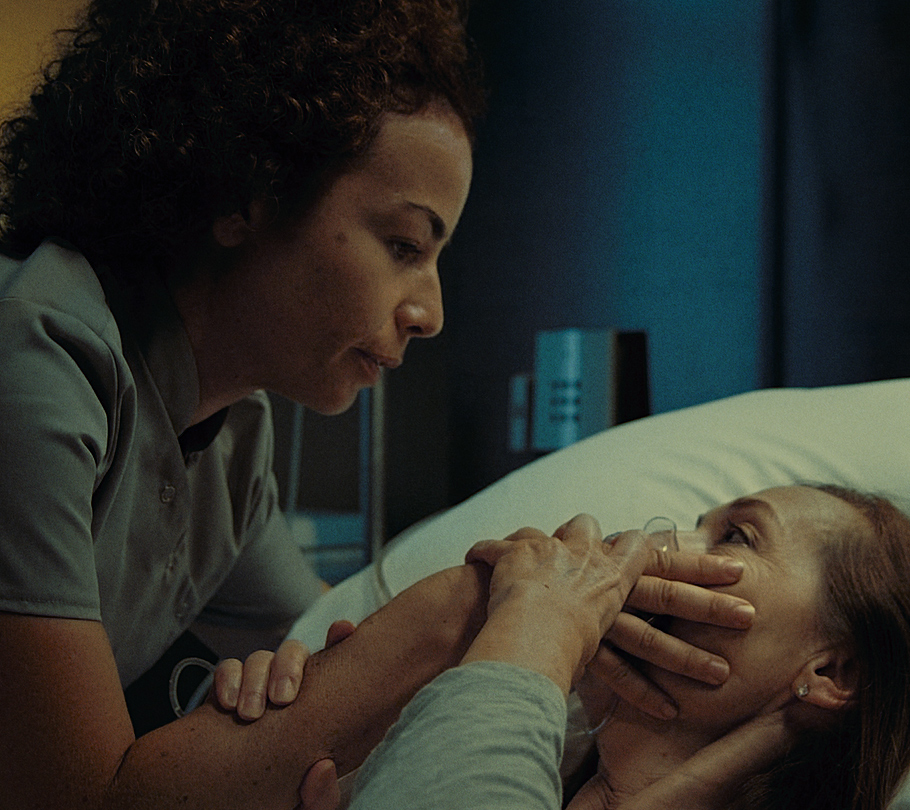
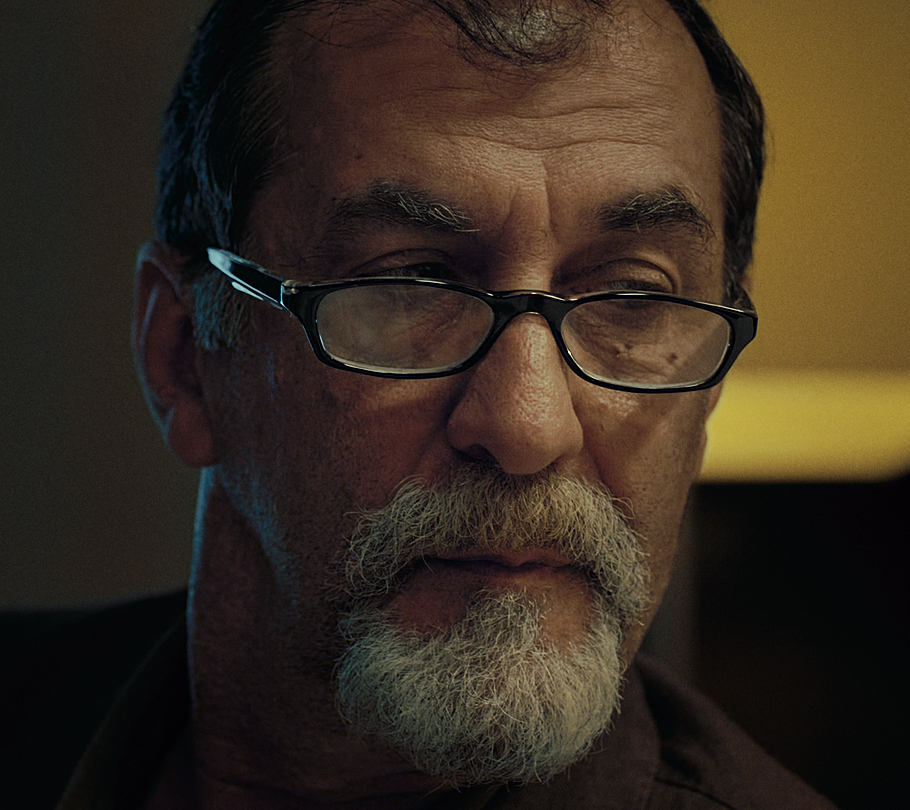
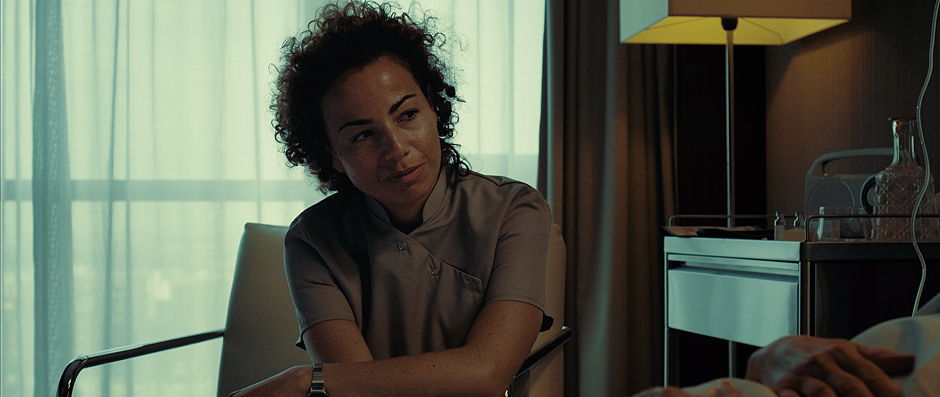
So how do the LUTs from my previous post look when used with footage from a serious production? Below are some real world examples using R3Ds from Alex Montoya’s great short film Maquillaje (Make Up). See the short film on Alex’s Vimeo page here.
If you’re interested in grading these R3Ds yourself, the original reduser.net thread with the R3Ds can be found here. These were all graded using the Kodak 2393 LUT.
As I always say, it’s really easy to grade well shot material. The quality of the source footage is a real testament to Alex, his cinematographer and everyone involved in the production.
About the grade
With this grade I was trying to reduce the palette to earthy browns and light greens, and at the same time giving more emphasise to any yellow in the scene.
I find it’s really difficult to judge how much saturation to add or keep in a grade. It’s very easy to fall in love with bright saturated colours as you grade, causing you to add more and more saturation as you go, to the detriment of how well the grade fits the content of the scene. I liken this to the anecdote of placing a frog in a pot of water on a stove and boiling the water. The water boils so slowly the frog never feels much of a change and never jumps out! It’s a good analogy and a good reminder to take breaks so you can review your work with fresh eyes.
I find its best to err on the side of less saturation. Looking at these grades now, I think it could probably be taken down another 5-10%.
You can see a breakdown of the grades in the video above. Click the images for full size grabs.


13 Comments
Matias says: January 23, 2013 at 3:58 pm //
superb!!!! great man! lookin forward for breakdown!
Ajith says: January 24, 2013 at 10:53 am //
Hi Juan Melara,
I tried my best to archive your look with your LUT… But I couldn’t be near your nice look. Please direct me how can I archive this nice blue orange warm look. I am looking forward to hear from you.
Thanks
Best Regards
Ajith
Juan Melara says: January 24, 2013 at 12:34 pm //
Ajith – I’ve just updated this post with a breakdown video. Hopefully this will give you a bit of an insight into how to achieve this look.
Ajith says: January 24, 2013 at 6:49 pm //
Thanks Juan, it’s really helpful breakdown…
Austin says: January 29, 2013 at 6:27 pm //
How do you keep the blacks black and whites white when adding color to the lows and highs? I know curves can achieve this. I’ve also tried using a qualifier to select and desaturate highs and lows.
When adding a cool cast to mids and lows, how do you keep blue artifacts from appearing in the skin, eyes, hair, etc? All of my attempts have blue fringes in the hair and eyes, making the grade look cheap and fake.
Thanks for posting all of these great breakdown videos!
Steve says: January 30, 2013 at 1:14 am //
Hi Austin,
Try parallel nodes. Juan has a post with a sample node setup from a couple weeks ago that should help you. You just create a series of parallel nodes emphasizing different elements of the shot. You may have a couple just for skin tones and another for creating the cast you’re looking for in the scene. You can create another node downstream to tweak any of these elements as well. That’s something I may do with eyes or casts sometimes. Working with quality footage will allow you to push this much further without much chatter or noise. DSLR footage and poor lighting can be very challenging to work out the noise when you’re creating your qualifiers. Hope that helps.
I dig your site and your work btw Juan!
Juan Melara says: January 31, 2013 at 2:48 am //
Austin – The blacks and whites aren’t completely neutral but I have adjusted them. Watch this video: https://vimeo.com/58251457 from about 9 minutes onwards. Use a node that affects just the whites or blacks and then balance them back closer to neutral.
You will occasionally see blue in the hair and eyes. That is actually quite normal for this look. If your skin node isn’t getting rid of it, do as Steve suggests and add another node downstream to tweak to your liking. Also make sure your white balance is spot on, if its too cool your skin qualifier mightn’t be very effective.
Vladimir says: February 13, 2013 at 4:18 pm //
These are fantastic grades! Would be amazing if you could do an in depth tutorial on how you went about grading this in Resolve. Cheers!
Rodion Zhabrev says: March 20, 2013 at 9:56 am //
Hi Juan,
Awesome job, thank you for sharing! Ho do you select skin tones so well? I using qualifier a lot, but it always makes me crazy about motion blur in shots. This blueish hallo around legs or around face mask: http://d.pr/i/lqYf
Hope you can help me with this.
Cheers,
Ro.
Juan Melara says: March 22, 2013 at 8:38 am //
Rodion – sorry for the delay in responding… That blue halo around the skin or similar colours is quite common, but is usually easy to avoid or at least easy to minimise. It appears because your skin selection is too narrow or too focused, you’re not getting a smooth blend.
In Resolve go to your skin qualifier and first adjust your Hue to take in more colours starting from purple all the way to yellow/green. Then in Saturation play around with the low soft setting and even the low setting so you are selecting more of the neutral colours. Then apply a bit of blur, I usually use a radius of around 20-60.
This should get you a better key. Switch each of the HSL buttons on/off to see what effect they have. You can quickly see which are doing too much or too little.
Hope this helps, let me know if you’re still stuck!
Rodion Zhabrev says: March 23, 2013 at 3:55 pm //
Juan,
Thank you! I’ve tried it. No good result.
Lum doesn’t affect hallo at all. I set Hue to maximum range. So only Sat can help me but it lowest part seems to be unmanageable for me. I shows results here: http://d.pr/i/R2iU
Motion Blur isn’t my friend
May be I just way too careful with colors? Finished version is here: https://vimeo.com/62239475 Is it as bad as I think?
Cheers,
Ro.
Adef says: April 10, 2013 at 5:42 pm //
Hello, i really love your grade and the mood that you create on this scene, i especially felt in love with the other one with the scarlet footage, where we see a man in an hospital (breakdown video from vimeo).
I’m a newbie on the color grading things, and i want to learn the different technique, and i think that i’m in the good place.
I recently shooted a short film with the scarlet for my own and i want to know if it can be possible that if i upload some of theme you can create a look for it, and after that i will try to reproduce it?
Trackbacks for this post
[...] possible with these LUTs using real world production footage? Check out my new blog post here. Footage courtesy of Alex Montoya, see his Vimeo page [...]