Print Film Emulation in 2021
October 2021 Update: New FilmUnlimited Flexible Film Emulation PowerGrades
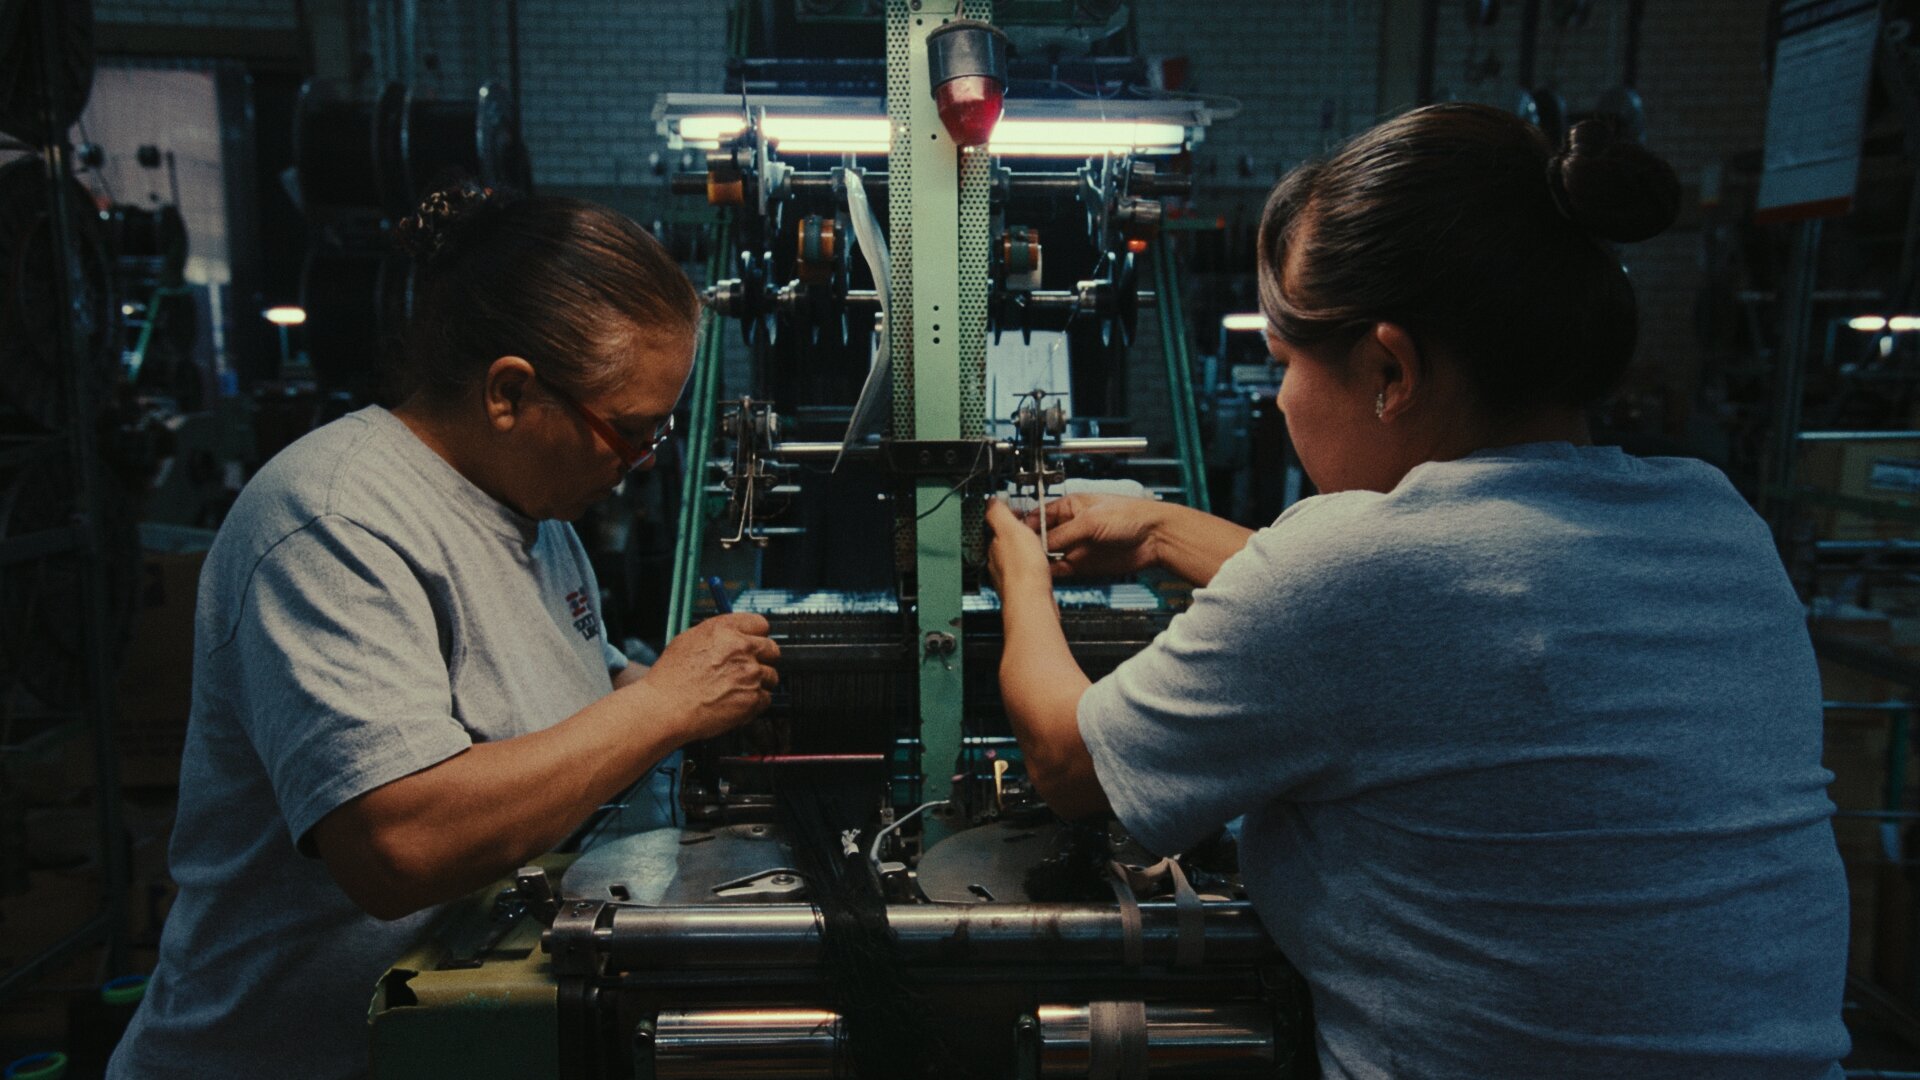


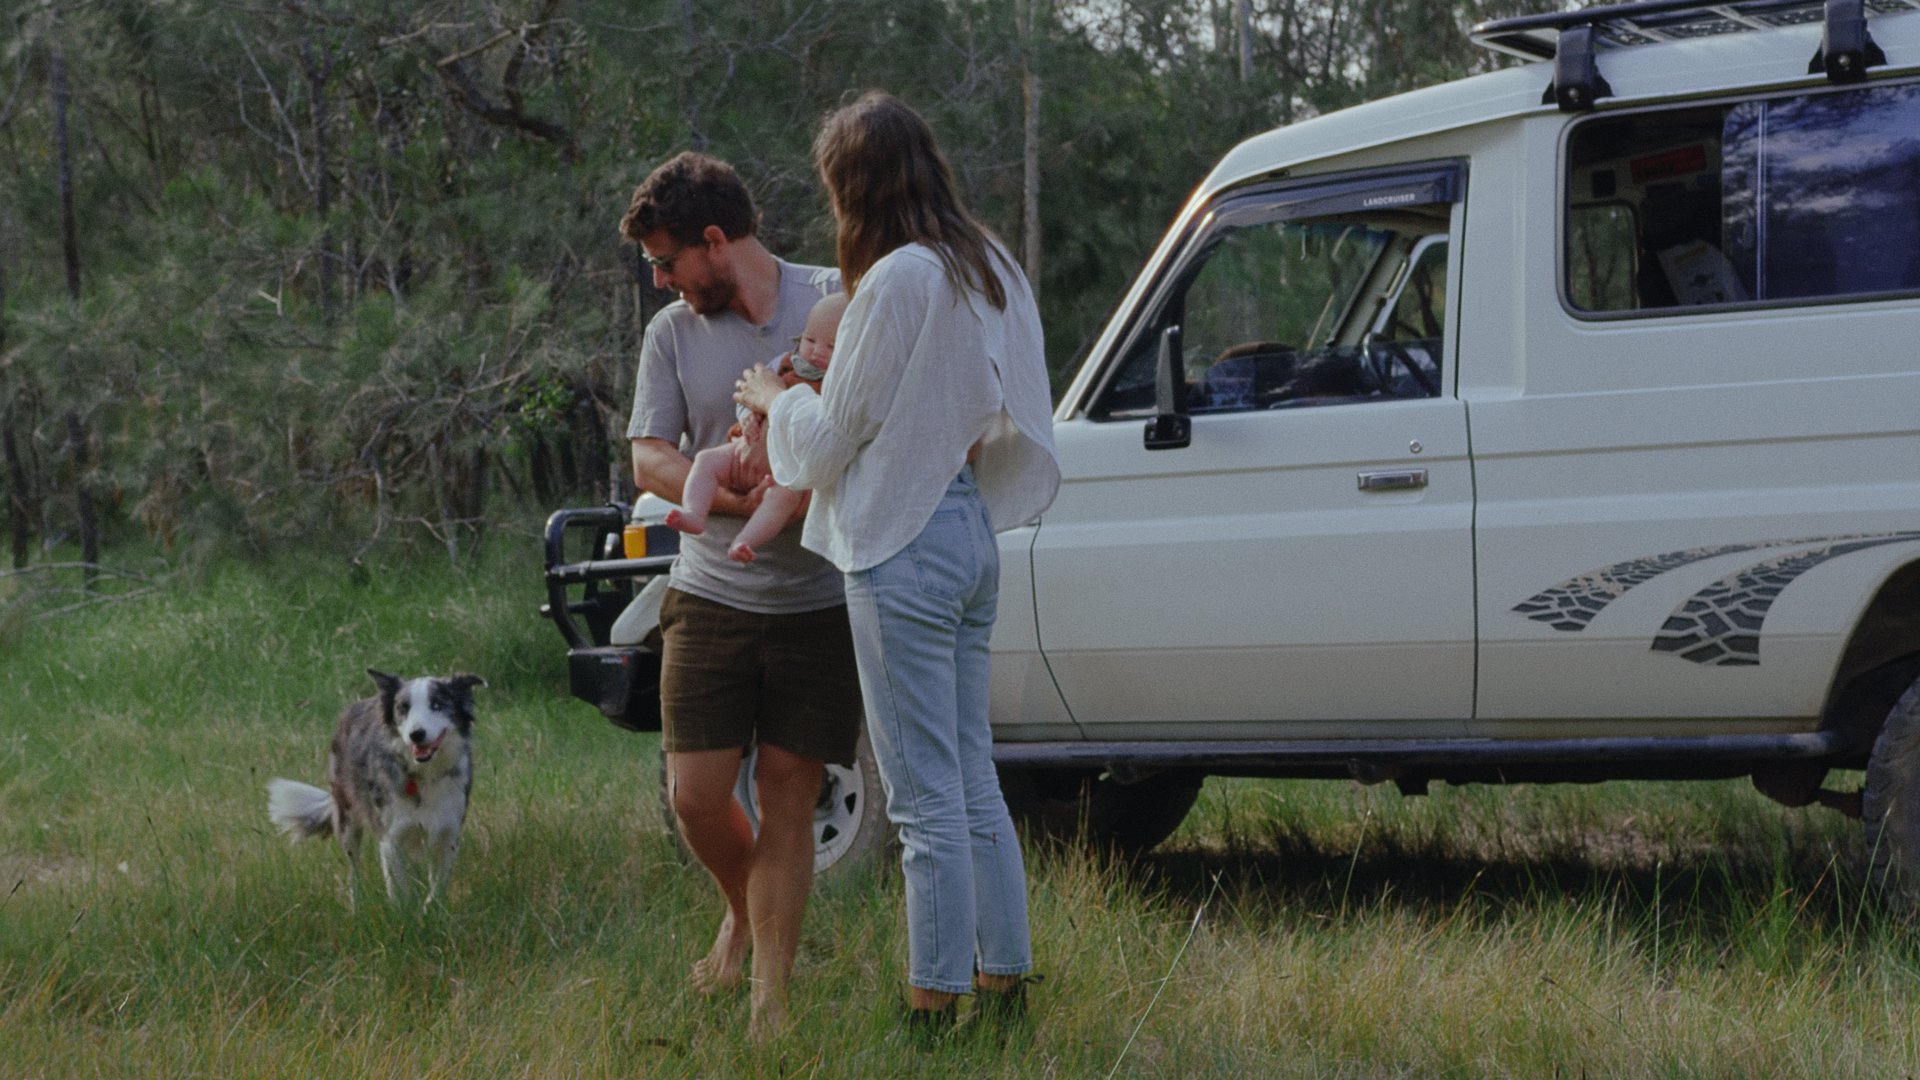


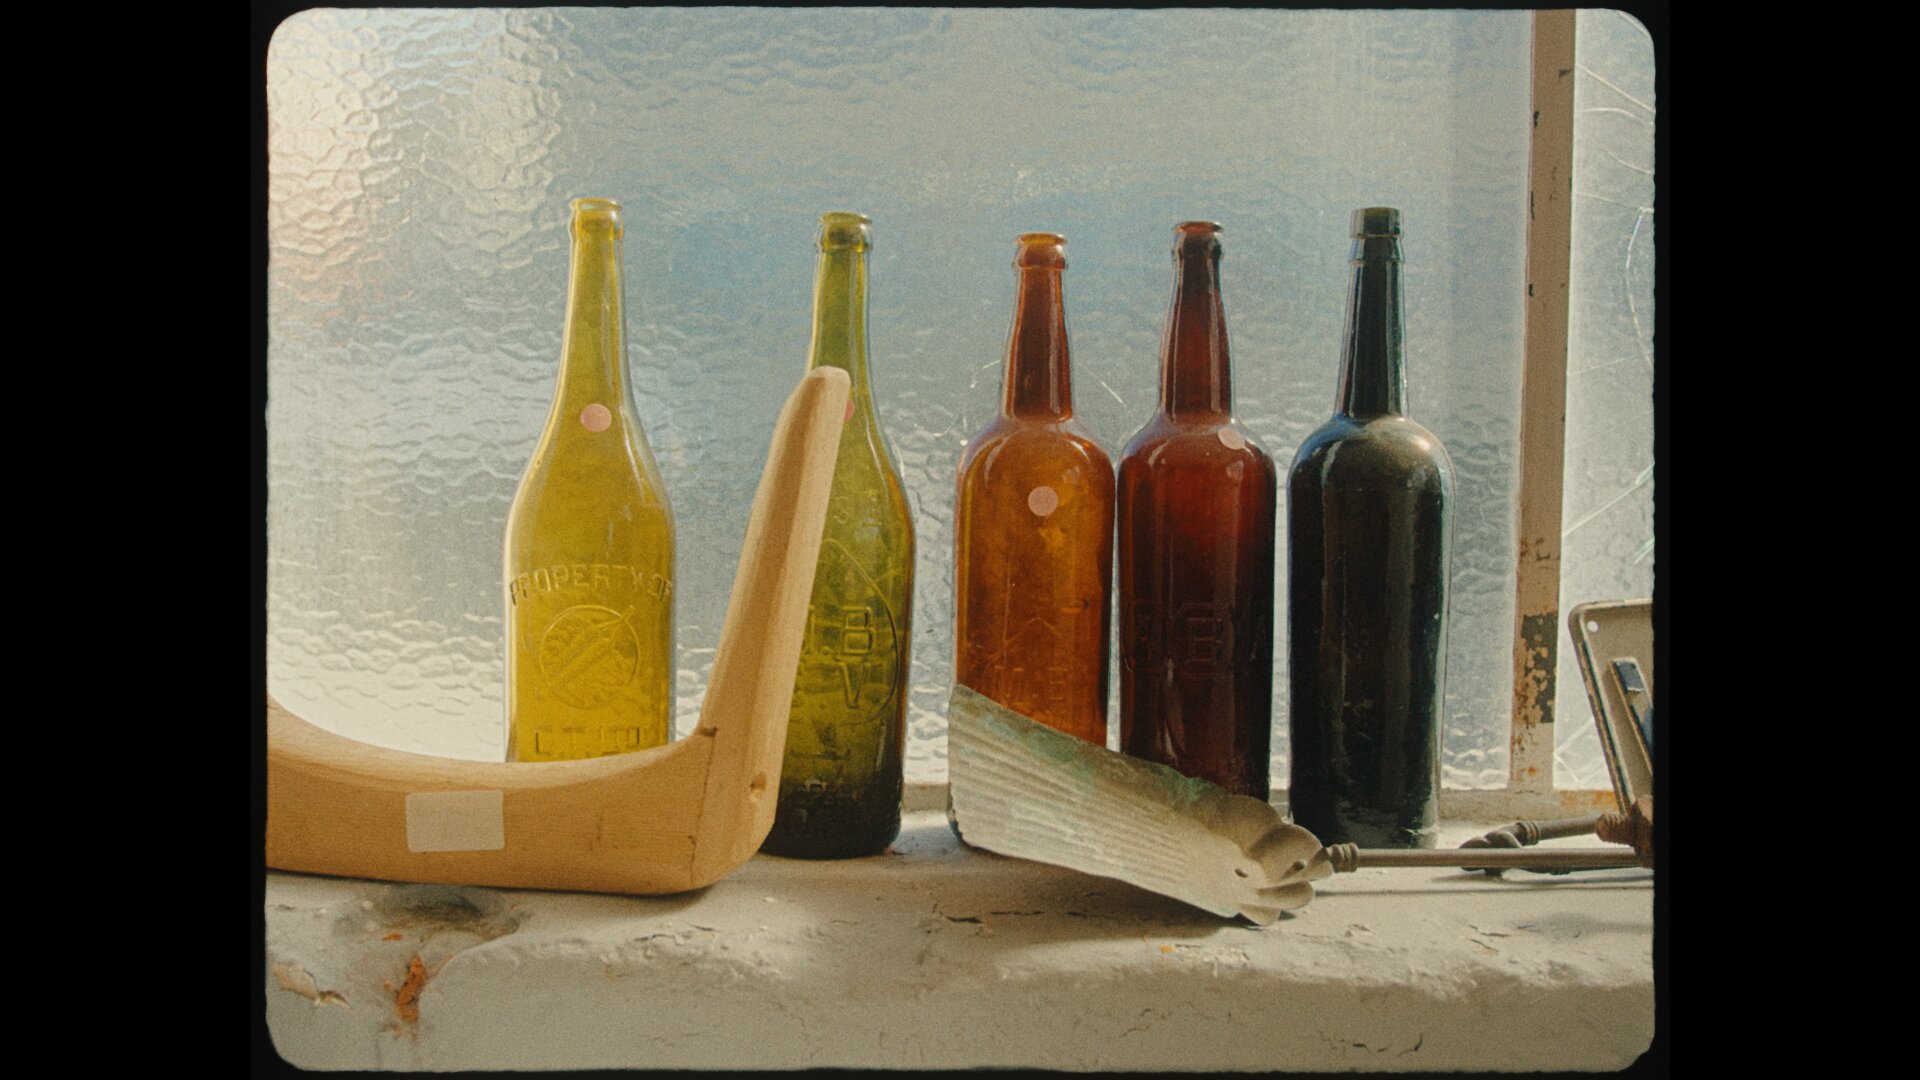
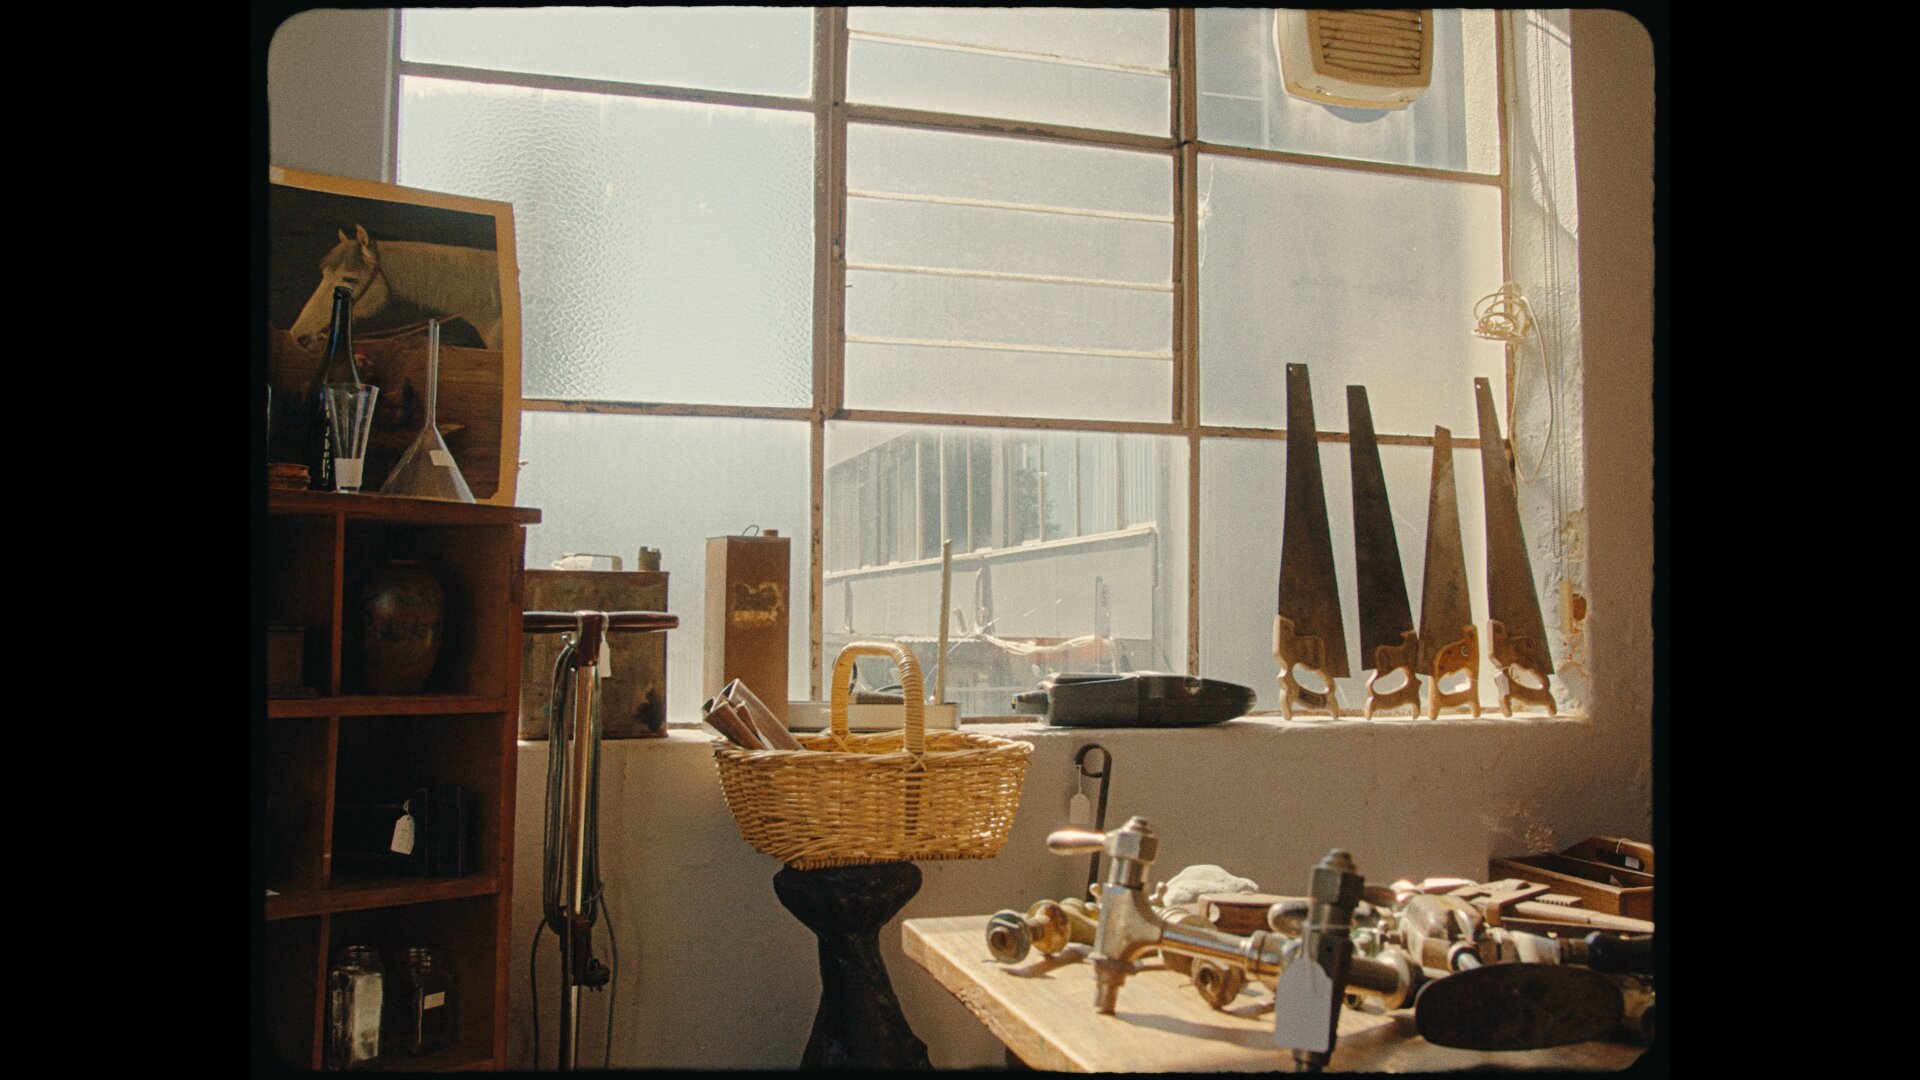


If you follow me on Instagram you’ve probably seen the results of my Kodak Vision3 negative film emulation work over the last few years. With the new tools introduced in Resolve 17, I’ve been able to accurately rebuild these LUT based negative emulations as native Resolve PowerGrades.
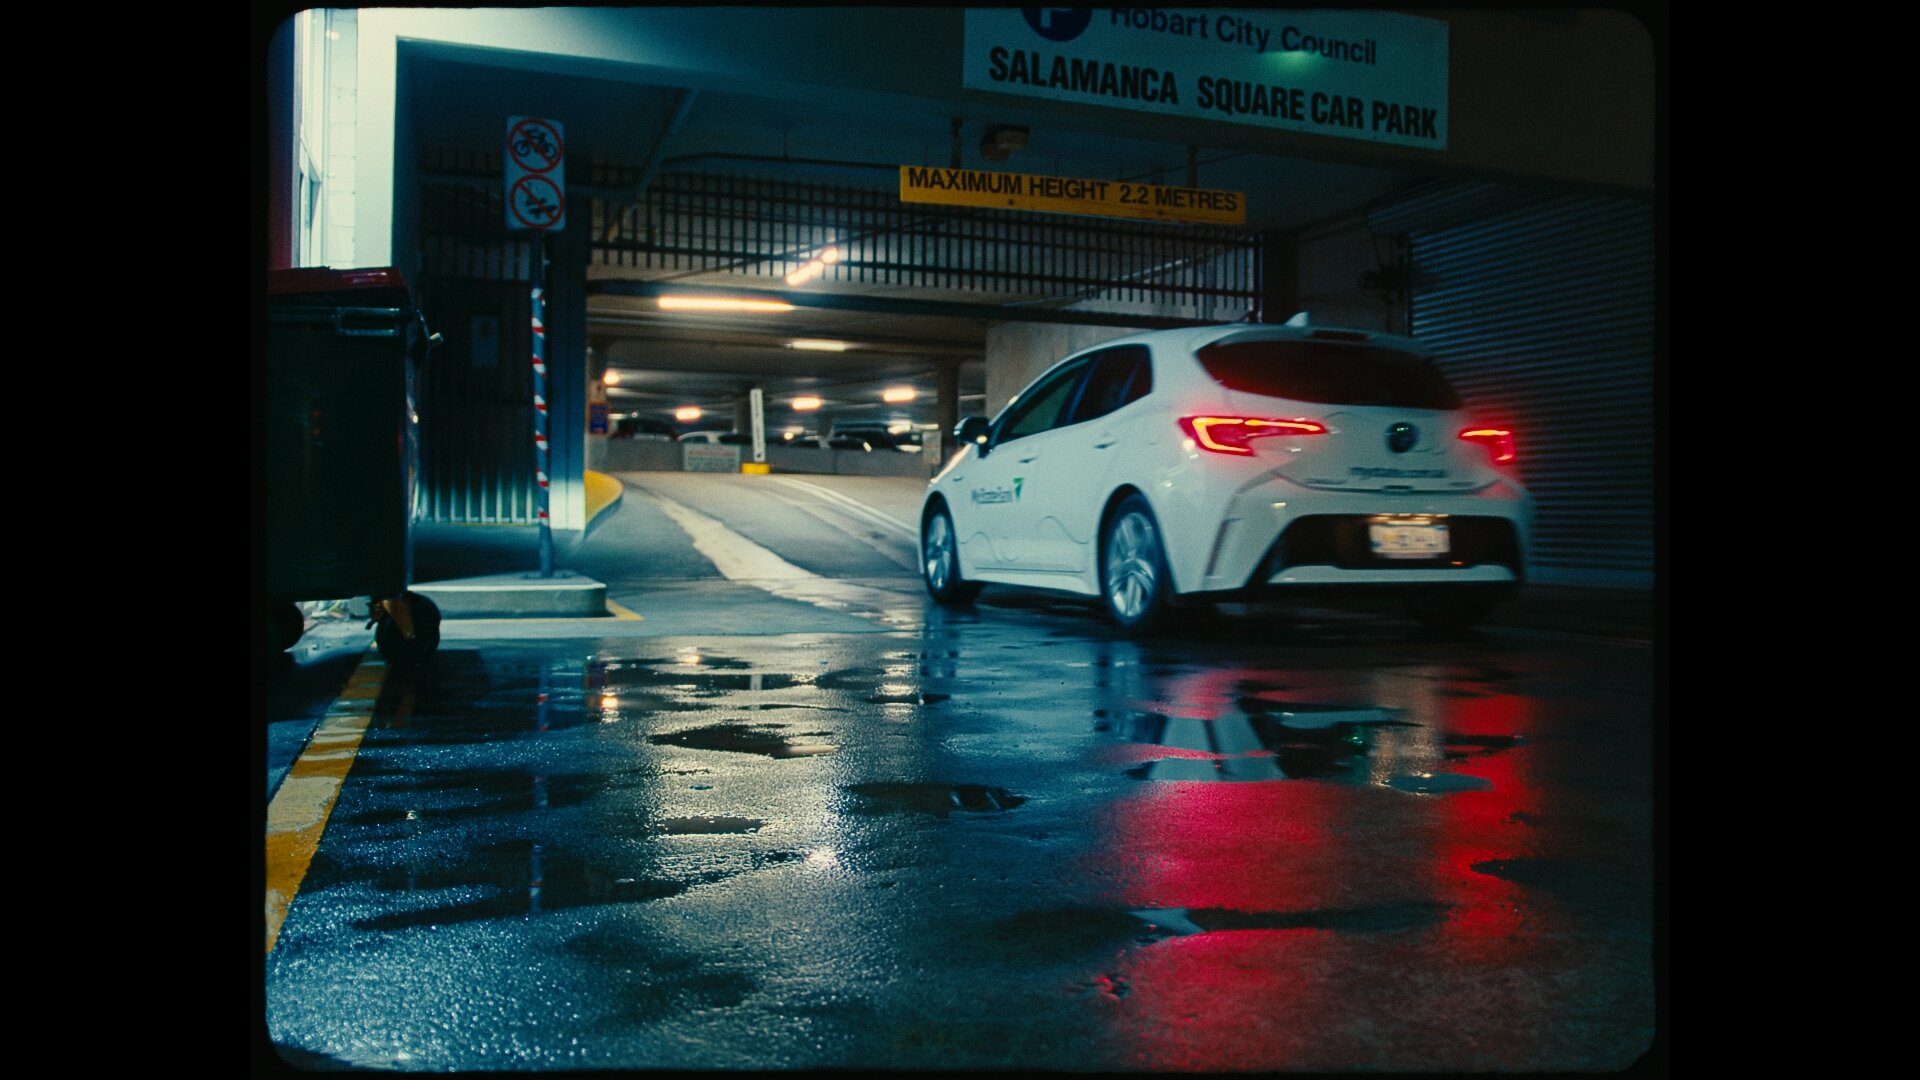
After hundreds of hours of work the project has been released as the FilmUnlimited PowerGrades: https://juanmelara.com.au/products/filmunlimited-flexible-film-emulation You can see some FilmUnlimited examples above but make sure you click through to see more.
There are two negative profiles: Kodak 5207 250D and Kodak 5219 500T, plus several different flavours of the Kodak 2383 PFE LUT. Also included is the physically accurate halation emulation I’ve been using for the last few years. Everyone has been asking me for it, so here it is.
And since the FilmUnlimited negative emulations are highly accurate they are fully compatible with the free PFE LUTs available below.
What is a LUT?
In simple terms, a look up table (LUT) translates one set of values into another set of values. They can be technical, for example converting a log image into Rec709. They can be creative, such as the teal and orange look or the thousands of other looks offered by the creative preset LUTs. They can also be used to correct the output of a device, for example a monitor calibration LUT generated from profiled data.
Another common use is to allow you to preview how your image will look when displayed on a different format or device.
Print film emulation
A print film emulation (PFE) LUT previews how your image will look when printed onto a print film stock. It accurately emulates the density and colour response of the print film, to give you an accurate preview on your grading monitor, prior to going to print.
To achieve this accurately your monitoring setup also needs to be profiled so that the generated LUT takes into account your monitoring pipeline plus all the lab variables and all the qualities of the actual print stock.
This LUT was traditionally applied at the monitoring level so that your grade would sit below it in the image display pipeline. Prior to going to print you would remove the LUT and then print your project onto the print film stock. If the LUT was accurate and had done its job, the resulting film print would be close to identical to the preview you had been viewing on your monitor.
Print Film Emulation As a Creative Choice
With the advent of digital projection, film as an exhibition format is pretty much extinct. This has seen the role of the PFE LUT change. It has shifted from being a necessity in the post production process, to being a creative choice.
The use of PFE LUTs purely as a creative choice is now probably more popular than ever. I use them for maybe 70% of my TV commercial work and maybe 90% of my narrative work. This also seems to reflect the percentages I see in a lot of the larger colour grading houses that have come from a from a film background. Once you learn the signature look of a PFE, you will notice them used everywhere.

Show me the LUTS
In the package you get the following print film emulations:
Fujifilm 3510
Kodak 2383
Kodak 2393
To understand how to best use these LUTs, please read the usage instructions below.
Installing the LUTs In Resolve
To install the LUTs in Resolve, bring up the Project Settings and select the Color Management tab. Navigate to the LUTs section and click Open LUT Folder. Copy the LUTs to this folder, then click on refresh LUTs. They should now be available for use in Resolve.
If you want to do this manually, you can copy the LUTs directly to the folders below:
On a Mac, the LUTs need to be placed in Macintosh HD > Library > Application Support > Blackmagic Design > Davinci Resolve > LUT
On a PC, place them in C:\ ProgramData \ Blackmagic Design \ DaVinci Resolve \ Support \ LUT
Applying A LUT
The easiest way of applying a PFE LUT is via a node. Create a new node, second mouse button click on the node and navigate to the 3D LUTs drop down, then select the LUT from the list.
Preparing your footage for The PFE
PFE LUTs expect log film scans in Rec709 colour space as their input. The closer you can get your footage to negative film, the better your footage will look after you apply the PFE LUT. The easiest way to make your footage look like negative film is to accurately emulate negative film. For information on how I do this, read the section below.
The next best method is to use a Color Space Transform (CST) node to transform your camera’s original gamma and gamut into log/Rec709. In a node prior to the PFE LUT, create a CST node. For the Input Gamma select the gamma of your footage for the Output Gamma you can select Cineon, but I prefer to use ARRI LogC. For the Input Gamut select the gamut of the footage, for the Output Gamut select Rec709. Below is a screenshot of how I would set this up for Sony S-Log3/S-Gamut3.cine footage.

This method technically transforms the footage to what the PFE LUT expects, but it still won’t match the look of negative film. The main differences you will notice is that skin tones appear to lack colour separation and may take on a monotone, green foliage appears yellow/brown and reds are closer to orange. This is due to the differences between the way digital sensors and negative film see colours.
A Better Way TO USE PFE LUTS: Negative Film Emulation
A better method is to fully emulate negative film stock prior to the PFE LUT. This will transform your footage into exactly what the PFE LUT is expecting. Which will give you far superior results over using the CST method above.

Over the last few years I’ve shot and profiled several negative films stocks. Late 2021 I released these profiled stocks as part of FilmUnlimited. FilmUnlimited includes two negative stocks: Kodak 5207 250D and Kodak 5219 500T. Along with these emulations, FilmUnlimited also features accurate halation, grain and gate weave emulation, plus my custom modified 2383 PFE LUTs that can be easier to work with than the free LUTs on this page.
The in-camera version of FilmUnlimited also includes LUT versions of the emulations that allow you to preview the look while on-set.
Below is my Sony FX3 camera test graded using Sony2Alexa and FilmUnlimited Kodak 500T. Using the Sony version of the 500T in-camera LUT allowed me to accurately preview the look while shooting.
Grading Under a PFE LUT
If you’re not using negative film emulation, the first thing you may notice after applying the LUT is that the footage appears dark and with too much contrast. It may also lack saturation. This is normal. Contrast can be adjusted using the contrast/pivot controls, and luminance can be adjusted with the offset master slider. The offset wheel can be used to white balance the footage. If you make a big move with the offset wheel, you may need to counter it with the shadow log wheel to remove any tints you introduced into the shadows.
Saturation can be addressed by using the saturation control, but first I would double check you’ve correctly converted your footage to Rec709 using the methods above. Then you can add more saturation as necessary.
Beyond print FILM emulation LUTs
Something else I’ve been working on is rebuilding PFE LUTs as fully editable Resolve PowerGrades. I’ve now rebuilt multiple print film stocks: Kodak 2383, Kodak 2393, Fujifilm 3510, Fujifilm 3513DI and Fujifilm 3521XD. These are available as standard Davinci YRGB PFE PowerGrades or as Resolve Colour Managed / Davinci Wide Gamut PFE PowerGrades.
PFEs as PowerGrades bring a lot of flexibility not possible with regular LUTs. And while I’m a big fan of PFE LUTs, there are certain situations where they just don’t play well with the source footage. For example, I often find that if the colour of a clients product has to match a swatch perfectly, it can be very difficult to achieve under a PFE LUT. In these situations I like to swap out the LUT with the PowerGrade version which then allows me to make modifications. Or I just grade the entire project with the PFE PowerGrade from the start.
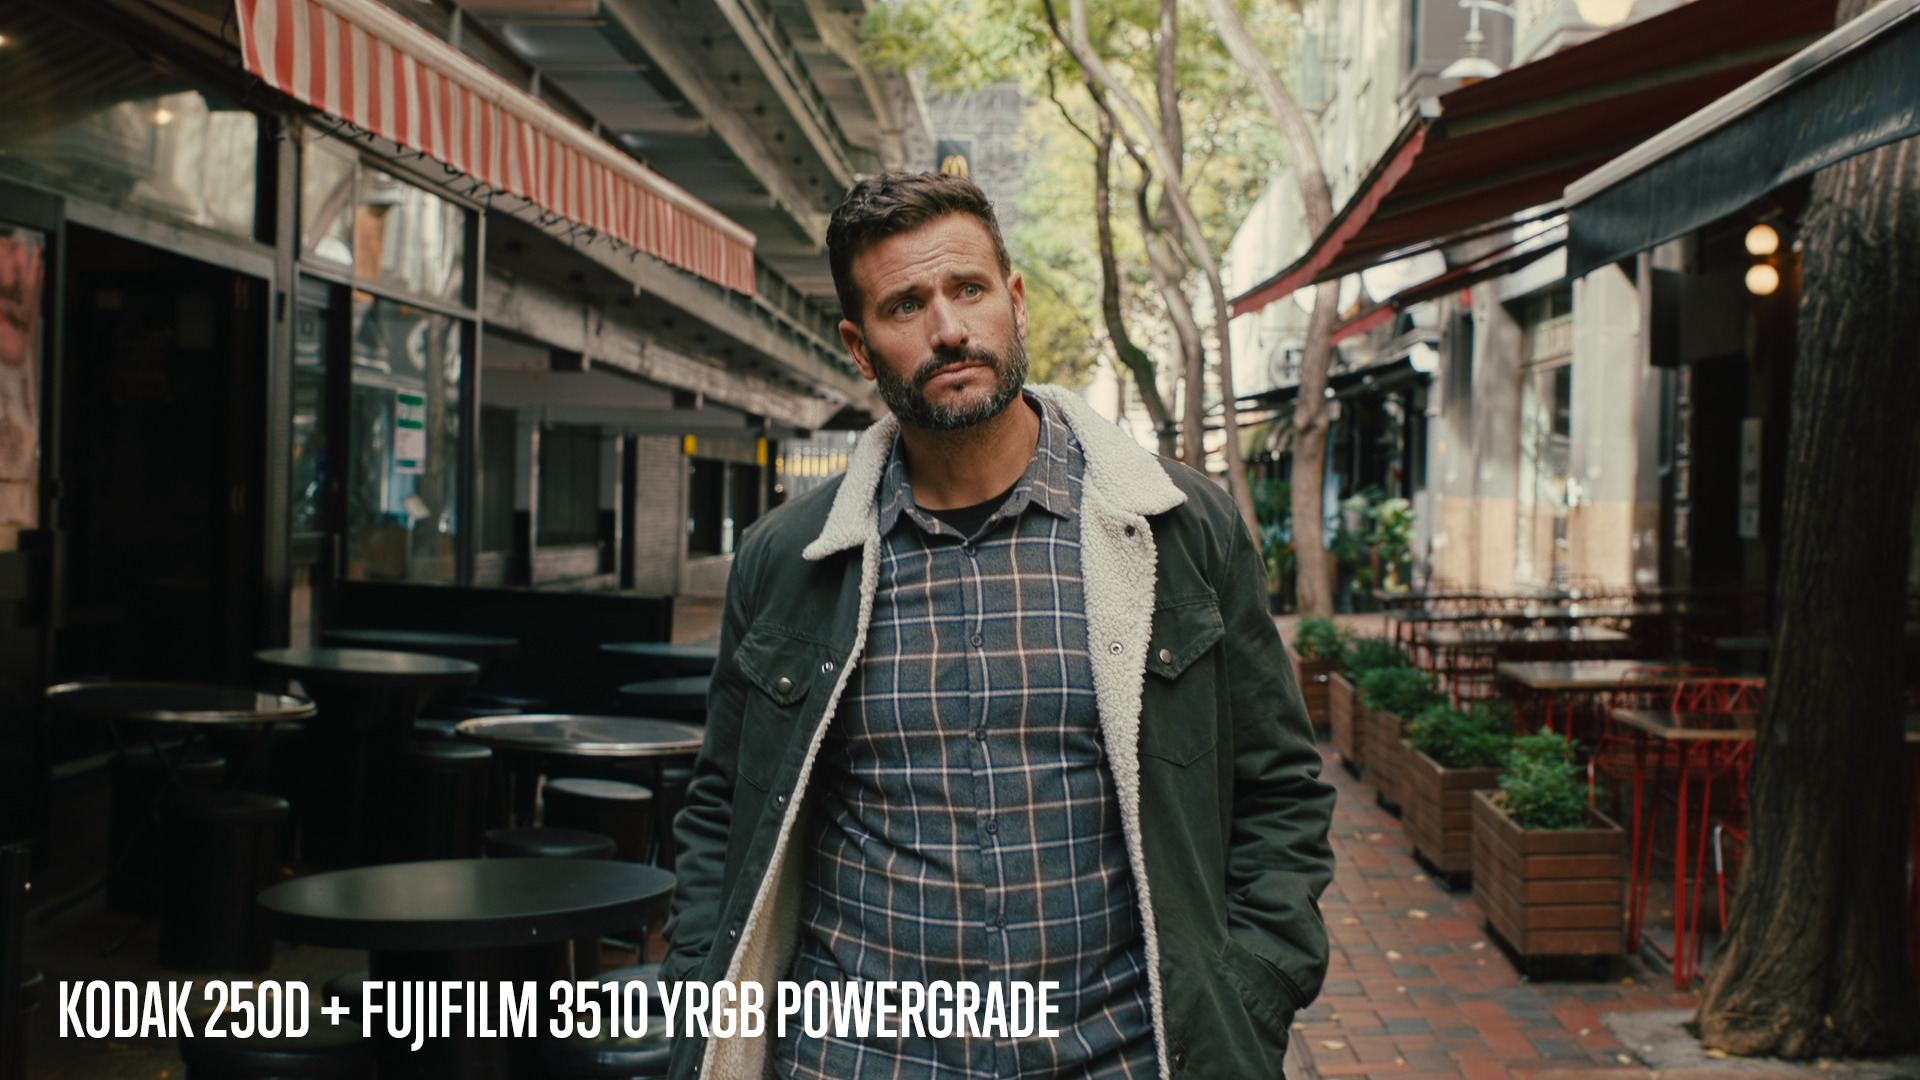
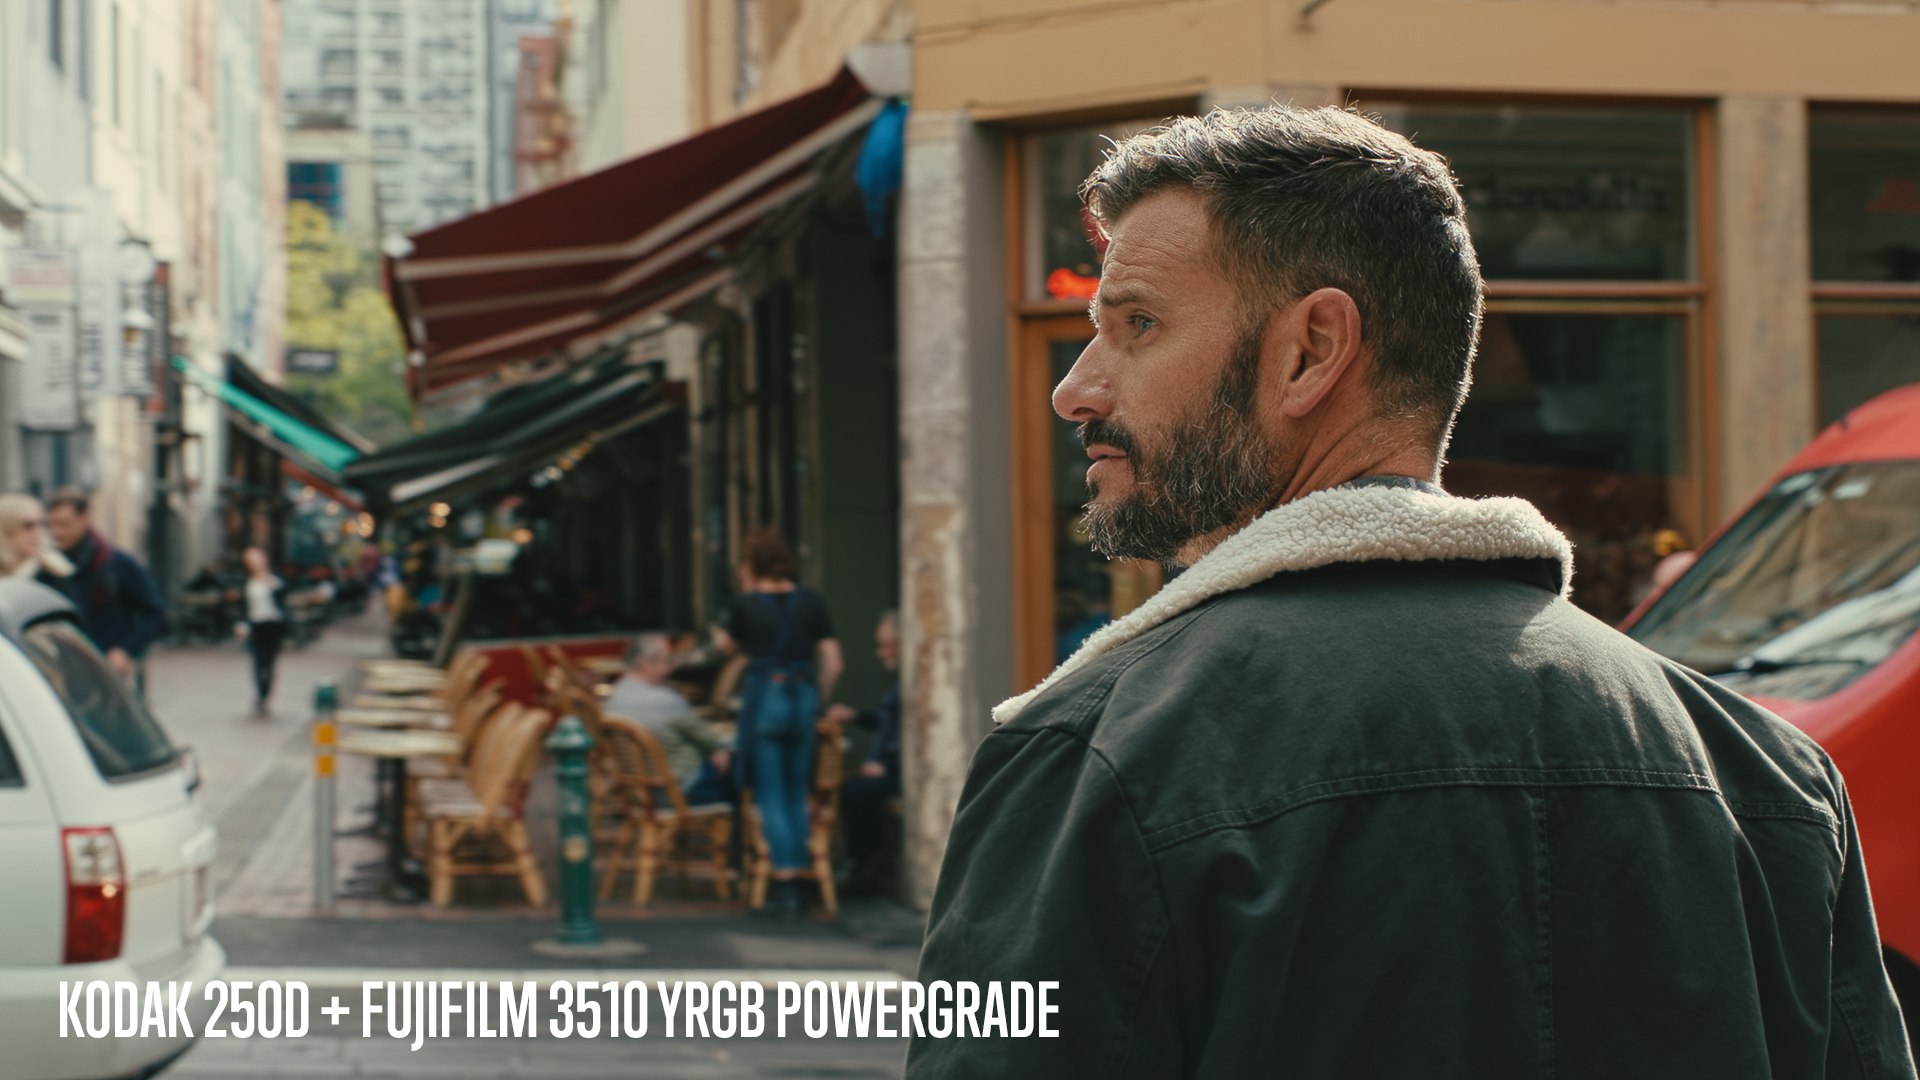
The following stills are graded using the FilmUnlimited 250D negative emulation plus the YRGB PFE PowerGrades.